Welcome to the Slinky Web3AI Testnet! Whether you’re new to Web3 and AI or have some experience, this guide will help you navigate our platform. With Slinky, you can build an AI-powered app and launch a token for it in just a few minutes. We’ve streamlined the process so you can focus on your creativity and innovation. Let’s dive in and get started.
Step 1: Claim SLINKY Tokens & USDT from Testnet Faucet
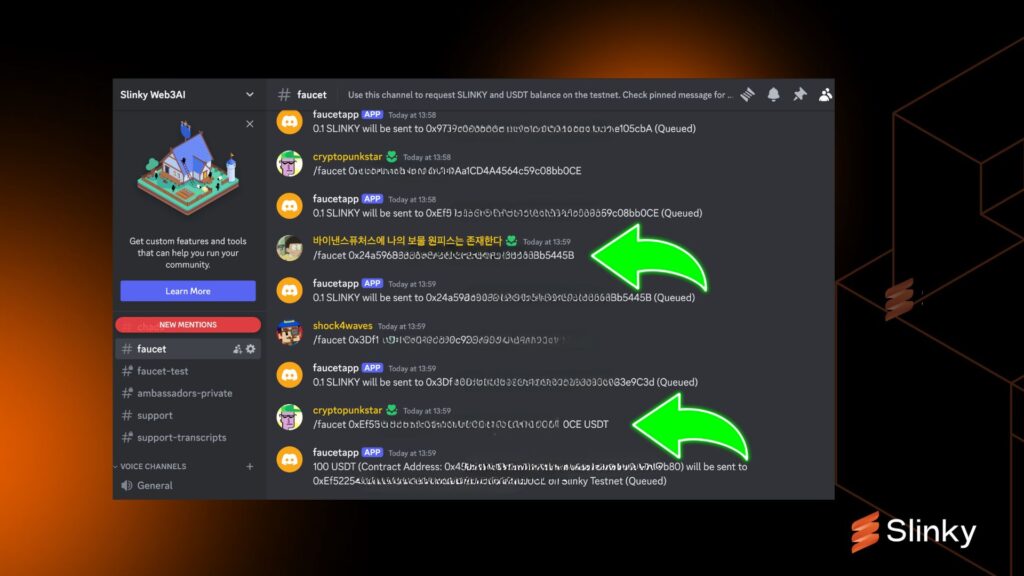
You can use our Faucet on Discord to claim SLINKY and USDT to use in the testnet:
- Go to the #faucet channel on our discord https://discord.gg/AkE2NgPehn
- Request 0.1 Slinky using this command -> /faucet your_address
- Request 100 USDT using this command -> /faucet your_address USDT

You can also claim 0.1 SLINKY from our web based faucet here -> https://testnet-faucet.slinky.network/
Step 2: Verify Your SLINKY Balance
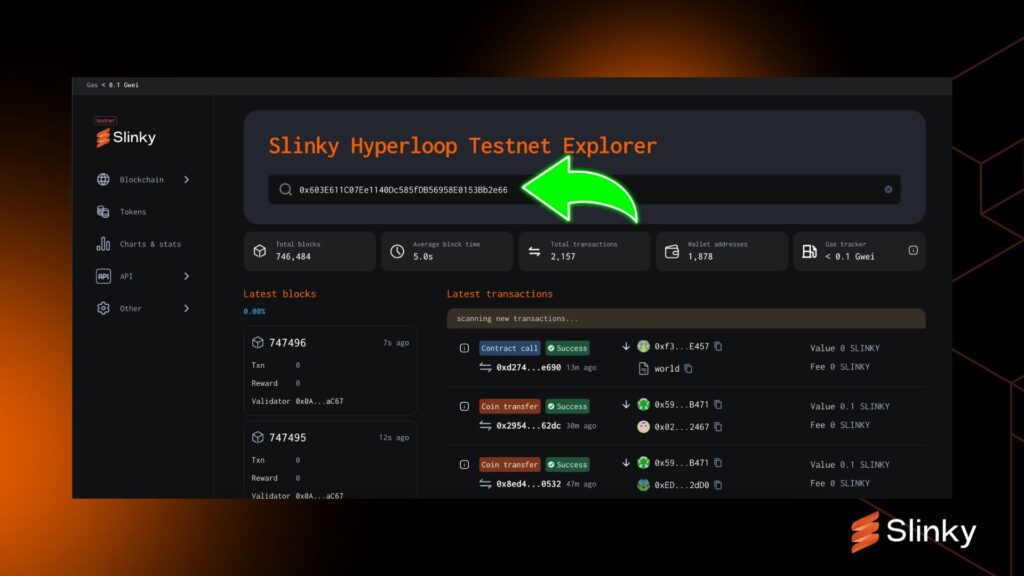
Next, make sure your SLINKY tokens are safely in your wallet:
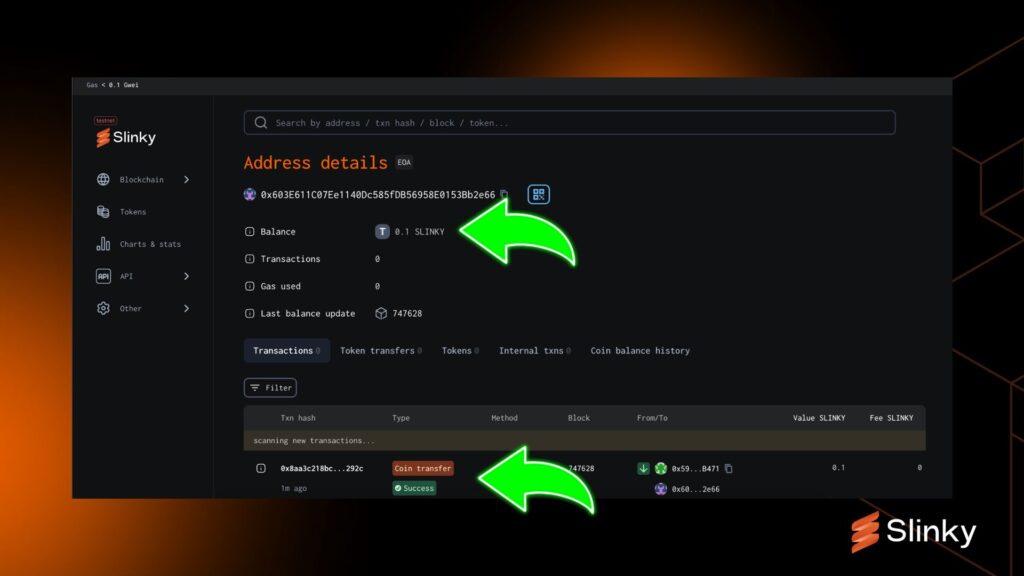
- Visit the Block Explorer: Go to Slinky Block Explorer and punch in your wallet address.
- Check Your Balance: You’ll see your new balance, along with any transactions, displayed clearly.
Step 3: Integrate Slinky Testnet with Your Wallet
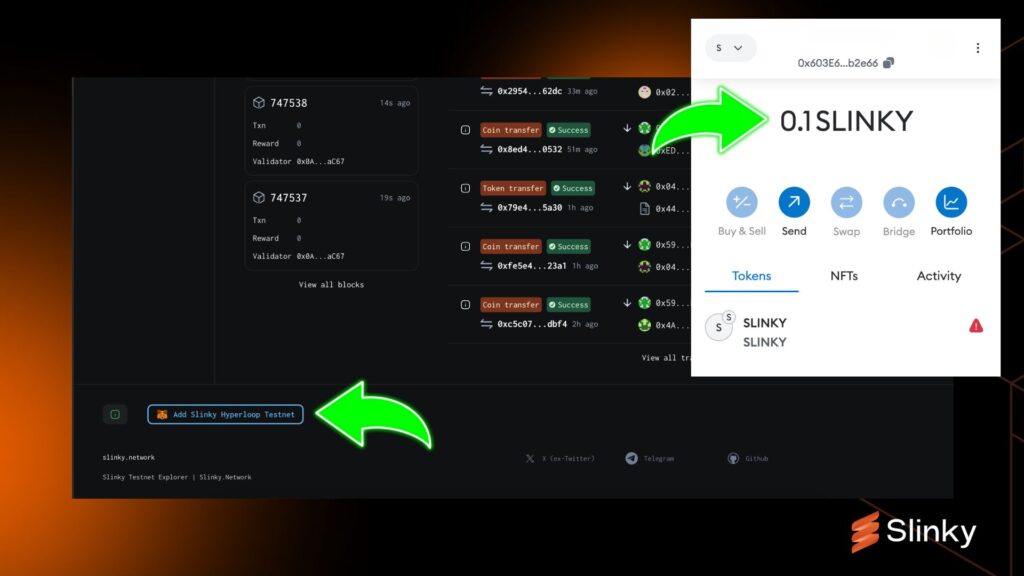
To interact seamlessly with our testnet, add it to your wallet:
- Easy Integration: Use the “Add to MetaMask” button located at the bottom of the explorer page for a hassle-free setup.
- Manual Setup: Prefer to do it manually? No problem! Here are the settings you’ll need:
- Chain ID: 88338
- Network Name: Slinky Testnet
- Currency Symbol: SLINKY
- RPC URL: https://testnet-rpc.slinky.build
Step 4: Connect to the Slinky Web3AI dApp Platform
Now, let’s get your wallet connected to our dApp platform:
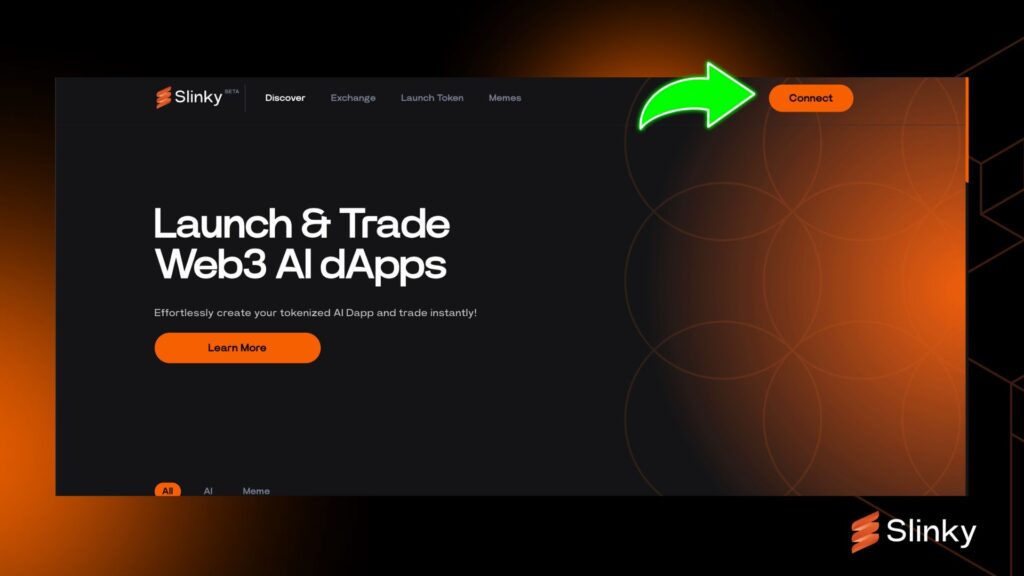
- Connect Your Wallet: Navigate to Slinky dApp and hit the “Connect Wallet” button.
Step 5: Create Your First Web3AI dApp
Unleash your creativity by building your first AI-powered dApp:
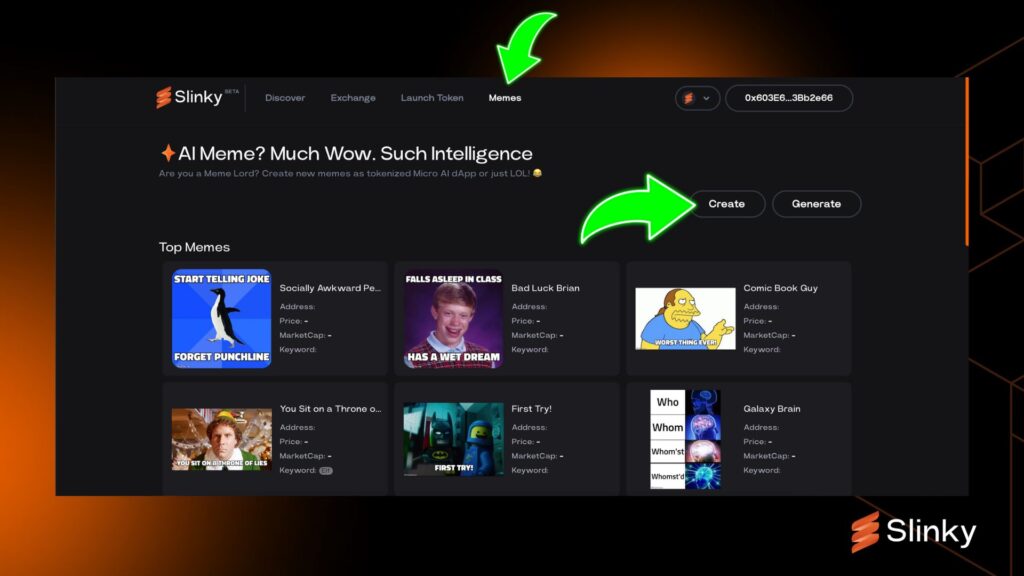
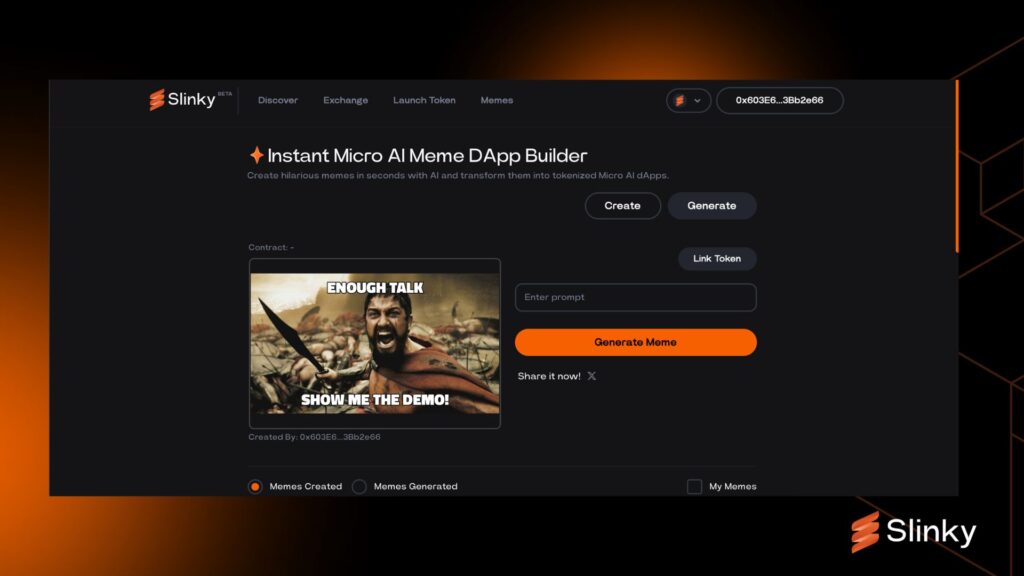
- Choose Your Template: Click on the “Memes” section to start with our AI-powered meme dApp template, our first dApp template on the testnet, and click on the “Create” button.
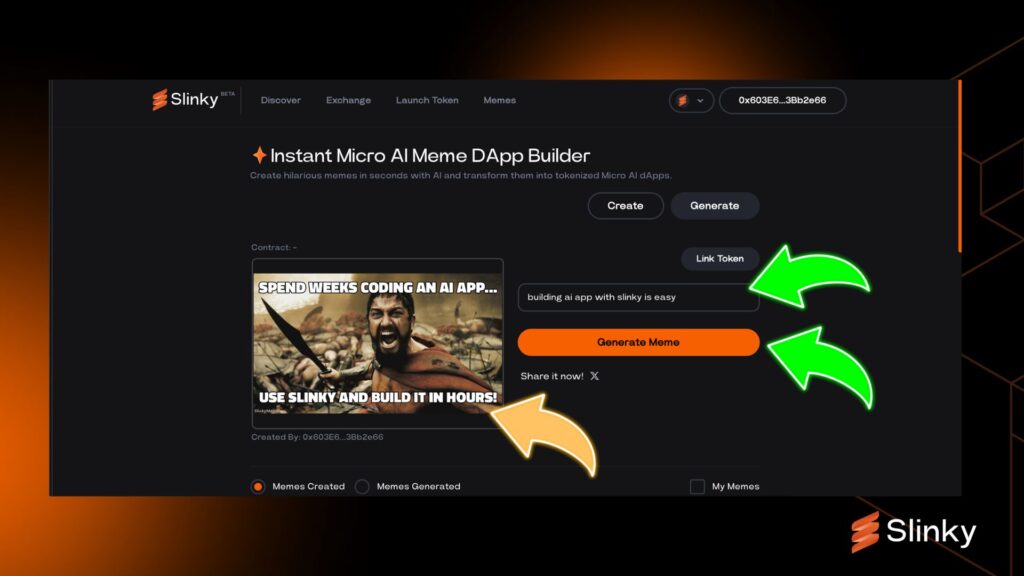
- Customize: Upload your image, fill in the required fields, and set up your AI system prompt.
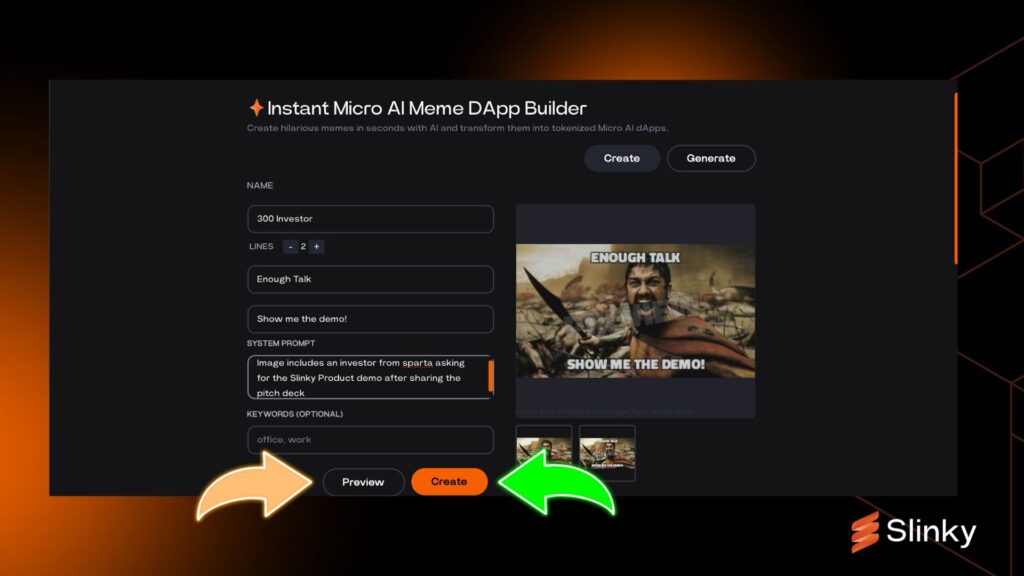
3. Preview and Create: Take a sneak peek with the “Preview” button. Happy with what you see? Click “Create” to bring your dApp to life!
Step 6: Link a Token to Your dApp
Give your dApp its very own economy:
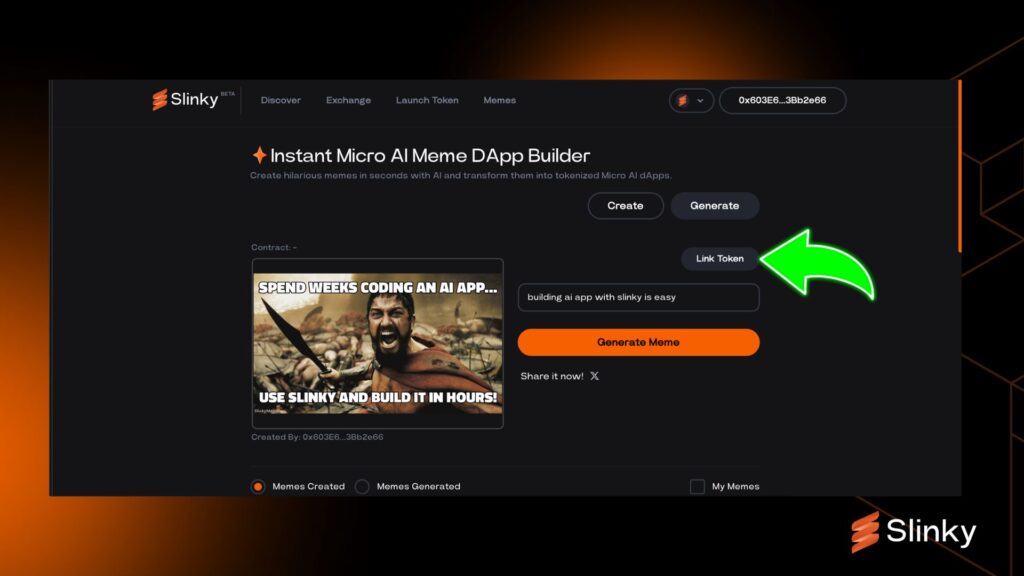
1. Link a Token: Inside your dApp’s page, hit the “Link Token” button.
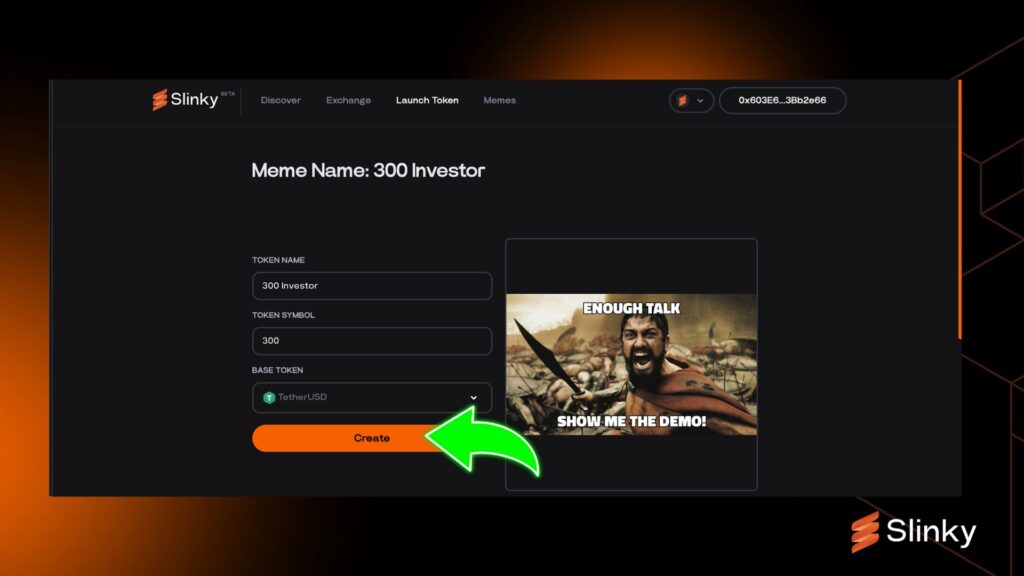
2. Set It Up: Simply enter the desired token name, symbol, and base token.
3. Launch: Our system does the heavy lifting, minting your token and setting up liquidity automatically
Step 7: Purchase and Launch Your Token
After creating your token, you’ll automatically be taken to the token trading page. From there, you can start trading your token right away. If you want to find it later, simply search for the token symbol on app.slinky.network. Don’t forget to share the token with your friends so they can join in too!

- Buy Tokens: Use USDT or another base asset to buy your token directly from the bonding curve.
- Launch Your App: Click “Launch App” and see your dApp in action, powered by your new token!
We hope this guide helps you easily navigate our testnet and inspires you to explore the limitless possibilities with Slinky Web3AI. Don’t forget to experiment and have fun creating something amazing! If you have any feedback, we’d love to hear from you—please share your thoughts through our feedback form.